Horsin' Around
Hi folks,
Still getting things off my “to do”/DIY list. Today the project is all about this "Our Generation Andalusian Hair Play Foal”. It’s smaller than the full “Our Generation” horses, being that it’s meant to be younger, and I think it makes it the perfect size for Barbie.
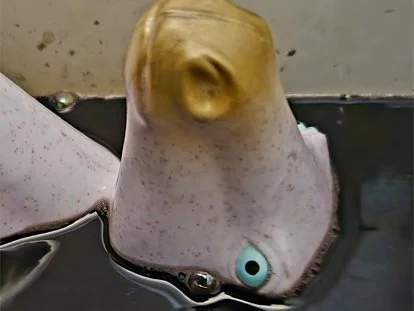
So, step one: take pictures of a super creepy looking horse. Am I the only one who thinks it’s unsettling as is?


Now, some of these nightmare fuel images could be the fault of the unflattering lighting, but I can’t take full credit for just how creepy this monstrosity is. Are we sure it’s meant for children? I think it’s the eyes that are really sealing the deal for me.

Step two: Wash said abomination so there aren't any particles on the surface. Anything remaining on the surface when you put down your primer coat is going to become a permanent part of the end result. Choose wisely how much effort you want to put into cleaning.
Step three: Make the horse look like it's having a serious midlife crisis. No, this isn't just cruelty on my part, this is to protect the mane and tail from getting damaged for the next step.


Step four: Painting. Now, this is a base coat, not the final coat. This is just meant to make sure future layers of paint stick well. Normally this would be airbrushed on to avoid streaks, however, I want streaks! I'm aiming for a short-hair texture, and layered paint is hopefully going to help me achieve that goal. Fingers crossed. Paint only one side, unless you can get it to stand up. I couldn’t, so half was the easiest route.
This color is Burnt Sienna:


Step five: Wait for it to dry. If you're using acylics, like I am, it souldn't take more than few moments, I left it for twenty to be on the safe side. Plenty of time to have a panic attack, question everything you've done so far, and worry that you ruined the horse and it's going to look like absolute garbage. For those of you who don't suffer from this level of anxiety, feel free to skip this step. And hey, if you are worried about that sort of thing, keep reading, and you'll see how it worked out (or didn't?) for me.
Step six: Because I painted with a brush, I had a few little spots that needed to be touched up.

Step seven: Now that your base coat is fully done, and dry, you can move on to painting the figure the final colors. I basically just mixed yellow, white, and other browns into the burnt sienna until I came up with something I liked. I recommend you do the same.
I've used these images for inspiration:

So, yeah, little bit of a journey there.
Next up (Step eight): Drybrush the overall animal with the lighter color, to add texture and depth.
Thankfully, this isn’t precision work just yet. I’m dreading the eyes.

Step nine: Matte varnish.
This is because I want to be able to brush and dry brush another layer. If I didn’t use the varnish, my dry brush would be damaged by this process as it’s water-activated. Not all acrylics are, so if yours aren’t, you can skip this step.
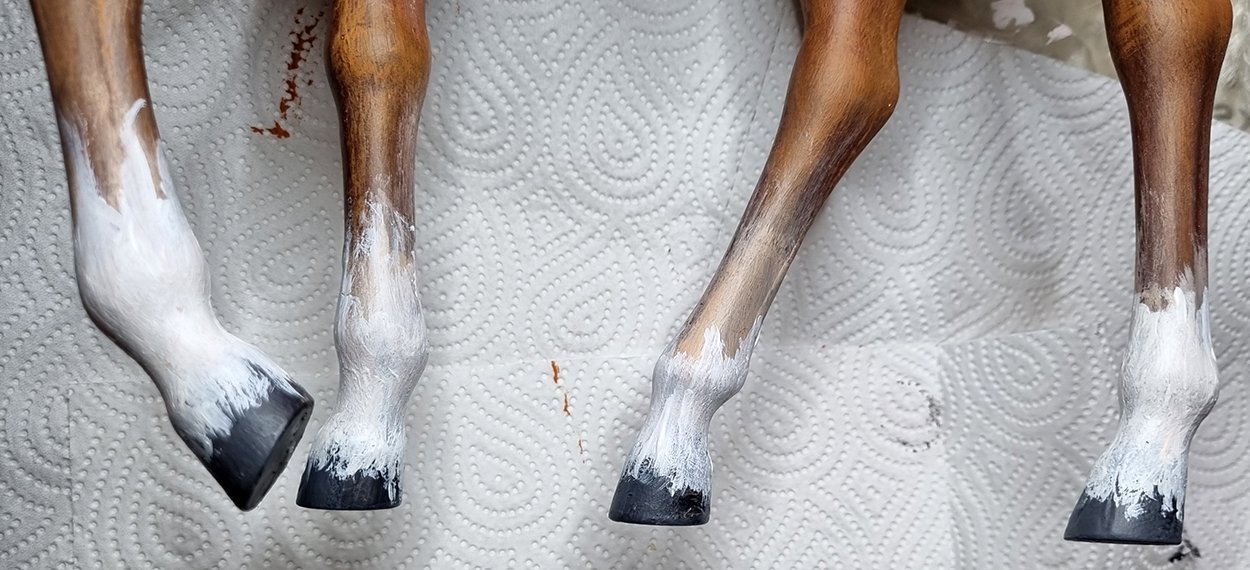
Step ten: Adding the socks and other lighter spots (like on the face), using dry brush, and mixing quite a bit of white into the original coloring. I guesstimated the amounts, this is all about repetition.


Step eleven: Hooves. This is one of the few times I’m actually using a proper miniature paint, mostly because I didn’t have any generic black. Don’t worry about making them even, in fact they should be thicker in the front. But we’re going to do several more layers of drybrush, so no worries about the edges.

Layers are friends!
Step twelve: Layers. Do as many of them as you need for the desired result. Because this animal needs texture, there’s no worries about having a bunch of layers. You’ve got this.


Step thirteen: Sadly, this is where some precision work came into it and I’m afraid the results are far from perfect. The eyes. The dreaded eyes. I managed between waiting for the sock layers to dry.


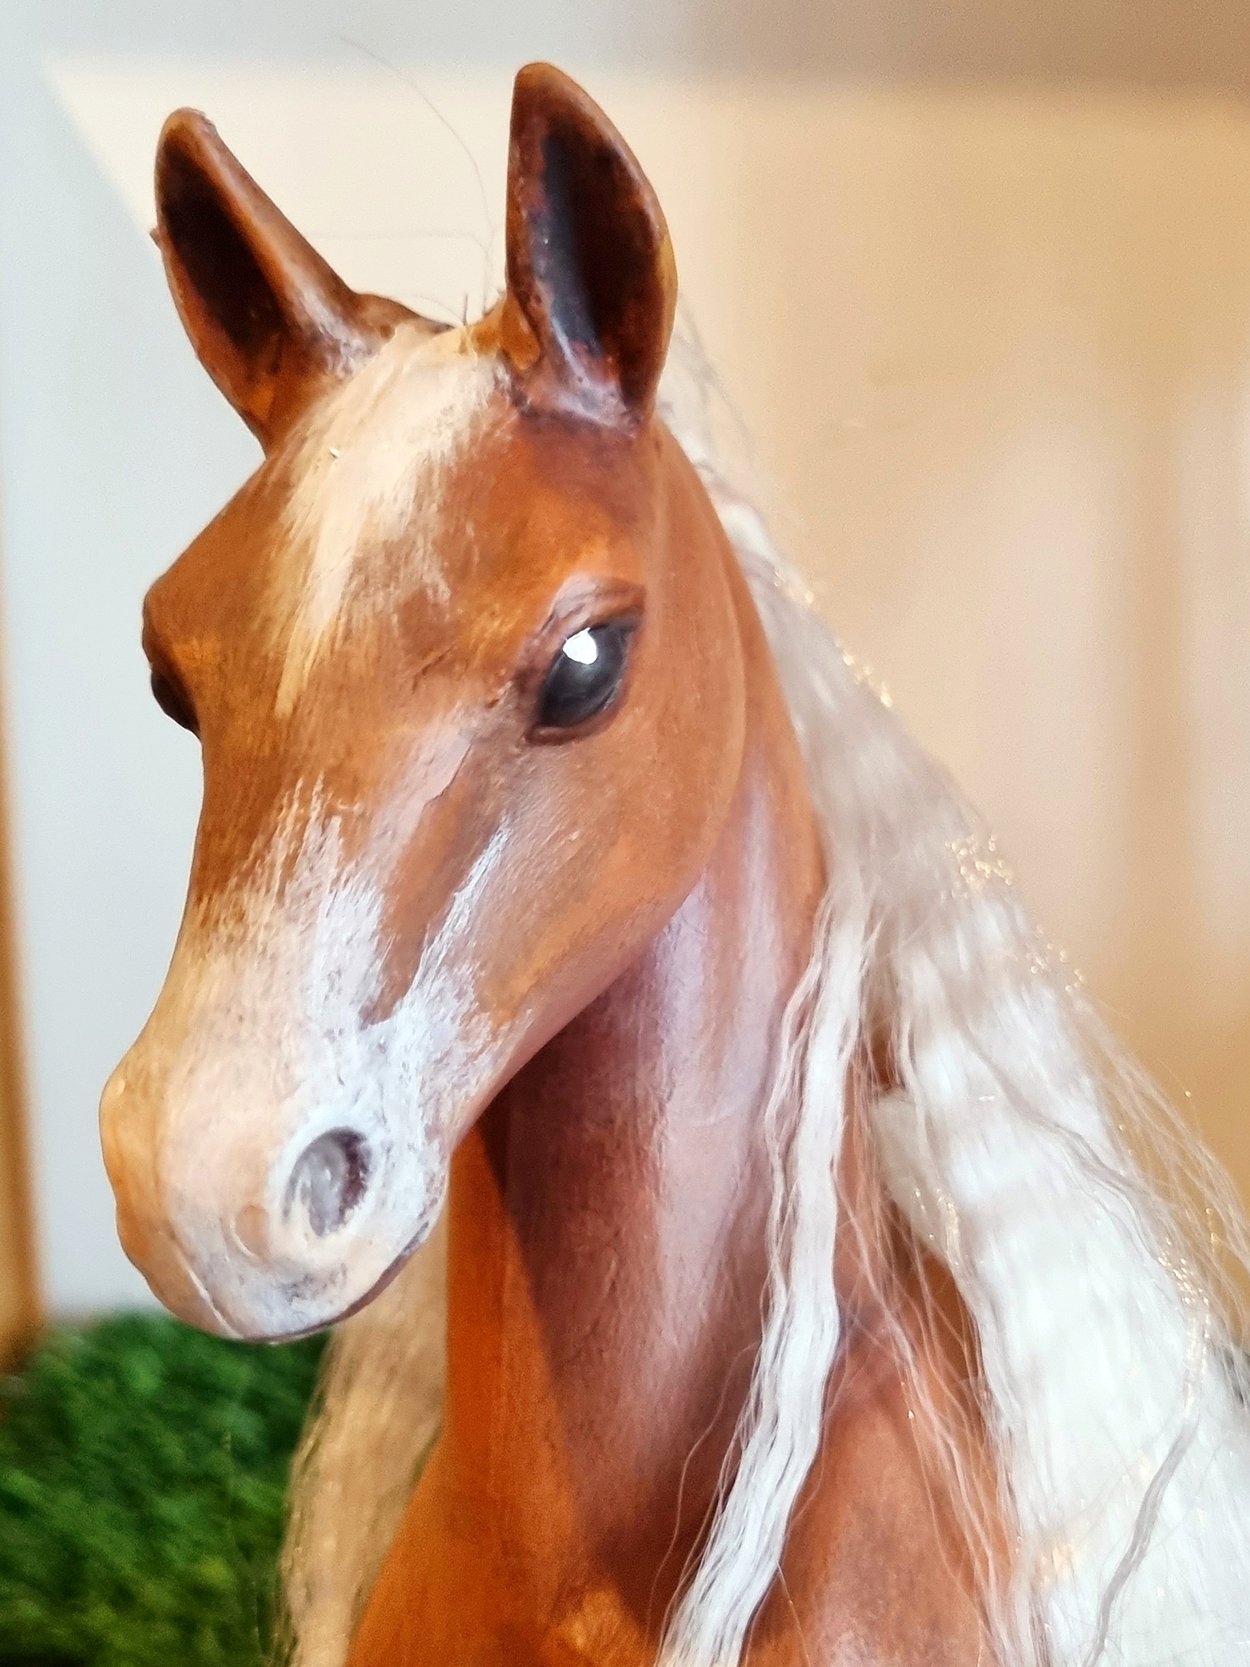
Step fourteen is tiny details. like adding highlights to the eyes, and a light dark ink-wash in the recesses, adding a bit of a darker shading where the shadows are naturally going to fall (to enhance them).

When you are at last satisfied, or at least satisfied to the point you don’t think you can manage to make it better, give it a coat of matte varnish. Except the eyes, give them a glossy varnish finish.
And viola: the end result. I didn’t re-paint any of the accessories just yet, but I might - might - be up for it in the coming days. We’ll see.
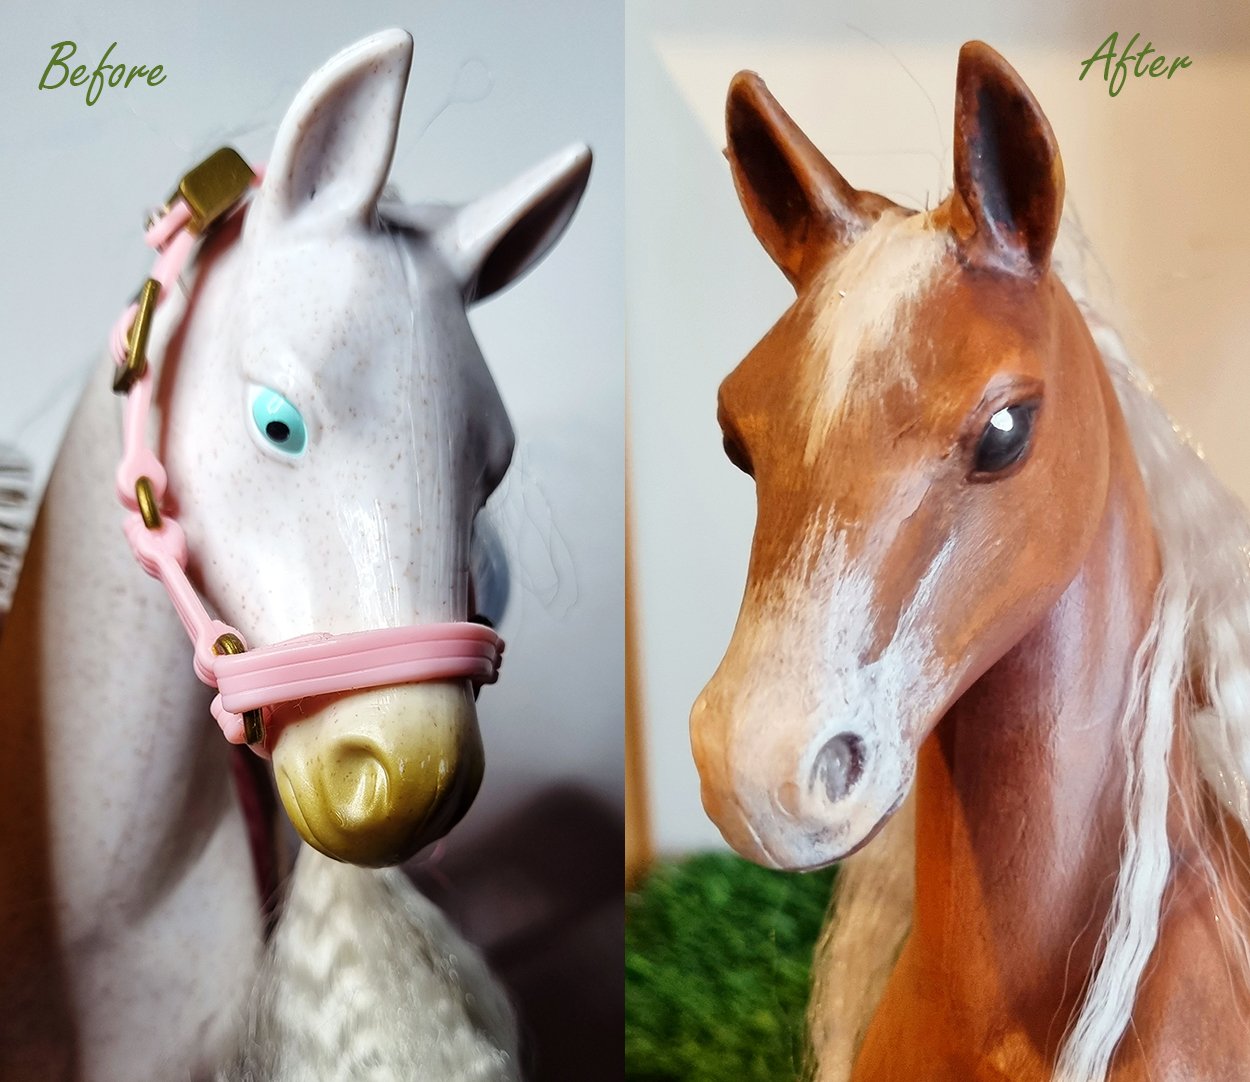


So, what do you think? Did I improve it or destroy it? Let me know in the comments.