
DIY Jack-O-Lantern
Today I’m trying desperately to distract myself from the wait of my newest doll to arrive from Australia, so I thought I’d do a little Halloween prep. It is one of my favorite holidays, after all. Yes, I’m still building the diorama – it’s an ongoing project – but every now and then it’s nice to take a little break for some interior decorating.
First things first, you’ll need some pumpkins. I ordered this set of ten from amazon to work with. They’re also available in white and I can’t say I’m not tempted for Thanksgiving. Then again, after this jack-o-lantern project, I’ll still have nine remaining pumpkins to play around with.


Creating this jack-o-lantern was pretty straightforward. First things first, as with their pumpkin-based counterparts, you’re going to need to slice into these. I used a box cutter; the only resistance I got was from the plastic on the outside. The foam was easy to cut through. Carefully cut the rough shape you want your top to be in. You’ll need to cut into the innards, connecting your slices, to make a cone-ish shape to get the lid off.


Once the top is off, just slice the stuff you don’t want as part of your lid off with the same tool. Easy. But we’re not quite done, you still need to gut this pumpkin. It’s not going to have that delightful pumpkin smell or the icky, delightfully gooey insides as it’s entirely foam. But you still need to scoop out the innards. Now, I’m personally hanging onto my stuffing because I’m thinking about doing either a bean-bag chair, or a string of popcorn for my doll’s holiday tree. But that’s another post (or two) entirely.
Figure out what face you’d like on your doll, and draw it on using a pen or a marker. Now, because my hands aren’t the steadiest, I went with a very, very simple drawing. You can get as complicated with your pumpkin face as your hands can draw, but keep in mind, you’re still going to need to cut the shape out of the foam.


Don’t worry about getting it perfect, as you can see, I’ve got quite a bit of ink leftover. If you like, you can trim it with scissors for a more accurate cut (I did).
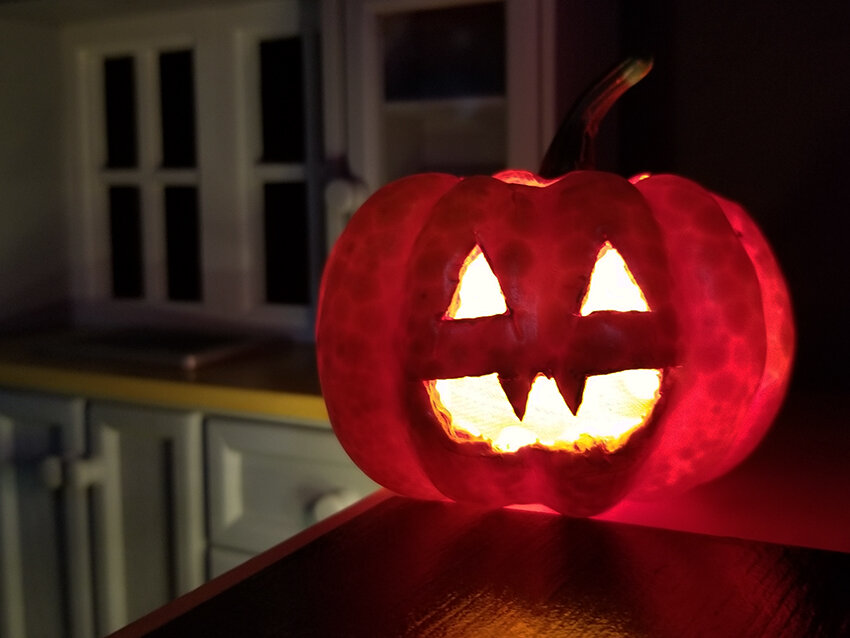
Next up, to give it a more realistic look, I decided to paint the inside. I used a 50/50 split between orange and yellow. In retrospect, I’d suggest 2/3rds yellow and 1/3rd orange, I think the color would better represent the innards of an actual pumpkin, and if you’re not planning to light up your jack-o-lantern, it’ll look better. Even without repainting it, I think it turned out pretty nicely.
I used the same color and dry-brushed the outer skin of the pumpkin as well, the dots aren’t nearly as visible as a result, that is, until you turn on the lights.


If you intend to put lights into your jack-o-lantern, you’re going to need to cut a hole in the back side and slightly to the side to avoid the hole showing.
You might have noticed the fabric in the head of my jack-o-lantern; that’s because when I tested my miniature fairy lights, they were way too bright. I needed something to dim it down, a little leftover linen fabric worked nicely.
As for the lights themselves, I’m obviously not using an open flame - I’m using miniature fairy lights similar to the ones you can find right here. I think the “warm light” is better than bright white. I’d suggest 20 little lights on a string, rather than the 40 that I’m using - little too bright. Still cute, right? I’ll just assume you agree.


I’m really looking forward to setting up the diorama and getting to use this for my Halloween post :) If you try this, be sure to let me know how it goes, I’d love to see your pictures.
Disclaimer: This post contains amazon affiliate links. While it won’t give a discount to you (sorry about that), it will give me a small amount of coin to spend on future items for the blog.


